
Sometimes, rock and mineral collectors accumulate more specimens than they know what to do with. There are more than 3000 minerals with different colors and crystal habits.
Collecting and arranging them can be challenging. This article provides you with valuable information you can use and get some ideas on organizing your mineral collection.
The article covers various topics like sorting your specimens, choosing what samples to display, arranging and displaying your prized pieces, and properly storing the rest of your collection.
How to Identify Your Minerals?
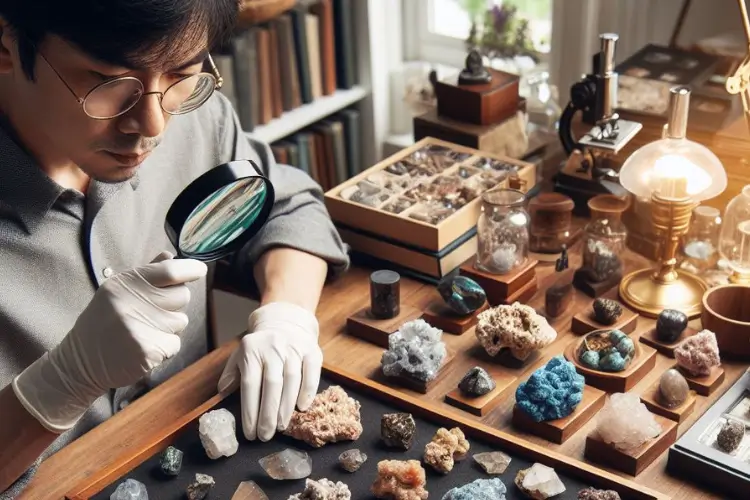
Identifying your minerals is vital since it helps make the entire organization and storage procedure easier. You can’t organize and store your minerals if you don’t know what they are.
Time spent identifying your minerals will be worth it eventually. You’ve probably identified your minerals if you have some experience in this field, and that’s good.
However, you can still invest some time to take stock of your inventory and ensure that the available information for each specimen is as accurate and uniform as possible.
Identifying your mineral samples can be challenging, mainly if you collected them a while back. We hope you are familiar with the samples; however, you can still ask for help from a rock shop, local club, or online if you aren’t.
Related Articles: How to Find Quartz Crystals (And Where to Look)
How to Label and Catalogue Your Minerals Collection?
How you choose to label your samples is up to you; however, there are two primary methods you can use.
They include keeping label cards inscribed with all relevant information about the specimen close to it.
Or, you could mark your sample with white-out and place a number corresponding to a label card kept separately.
You can also photograph the card and specimen together and save them somewhere safe if the cart gets lost.
Cataloging your samples depends on your personal preference. We would recommend including the mineral’s name, the location, the date it was collected, and who found it.
You should also record the documentation and information you may get if you purchase the specimen.
Cataloging your mineral collection is invaluable because it provides precious information that relatives and relatives can use to figure out the story behind each specimen.
You should get a rough estimate of each specimen, especially if you have some valuable pieces. This could help provide value for the collection so that it doesn’t get thrown away in the event of your death.
Related Articles: Where to Find Crystals – A Helpful Guide
How to Sort Your Minerals Collection?
You should feel free to follow your creative side when sorting your minerals. There’s no one right way to sort them out. Therefore, you should have fun with your minerals.
When sorting them out, you should consider a few things, including the makeup of the rock collection and personal preferences.
You can choose to sort them out by the following characteristics.
- Size: You can sort your minerals by size, easing the storage process.
- Color: You can choose to sort them out by color if you are a visual person. Placing greens, blacks, and browns can make it easier to find what you’re looking for decoration purposes.
- Alphabetically: You can choose to sort them out alphabetically, making it easy to find any minerals you need whenever you need them.
- Mineral group or class: You could sort them out by mineral class or group if you plan on doing mineral research or scientific studies.
- Type of rock: You can also sort your rocks by type if you plan on doing some further research or want similar types together.
- The location they were found: You can sort your rocks by location, allowing you to have a complete picture of where you found your rocks and traveled. You’ll notice that rocks from a similar geographic location look similar; however, your minerals may look different.
You can mix, match, or add personal categories depending on your preferences. Make it easier to tell your rock collection story through your samples.
Related Articles: What Rocks and Minerals are Worth – A Helpful Guide
How to Choose What Mineral Samples to Display?
You’ll have to select display samples from your collection depending on your preferences.
You’ll choose to display as many minerals as you’d want or as the space can allow and place the remaining specimen into storage.
Remember that you can throw away rocks that don’t add to your story to make more room for those that do.
You can choose minerals to display depending on their size, crystal group, class, location, etc.
You could display smaller versions of your mineral-like micro mount and thumbnail collections since they are smaller and cover less space.
Smaller versions are harder to observe with the naked eye but have better crystallization in comparison. Your specimen tells your story and, as such, shouldn’t have to be museum quality to be displayed.
It would help if you displayed them because they make you feel good and want to share that feeling with others.
Sometimes, even bad-looking minerals can tell some of the most intriguing stories. You can also use them to contrast better crystalized and more beautiful minerals.
Thus, you can choose to display ordinary-looking minerals if you find them interesting in some way.
People may ask you about them, allowing you to tell them the story behind the mineral. You can tell them how you found the mineral or traveled to get it.
Related Article: Why River Rocks are Smooth?
How to Arrange and Display Your Collection of Minerals?
You can arrange and display your mineral samples using your preferred method in section 2 of the article. Arrange the items you chose in step three in your selected space.
The ideal display location should be well lit, preferably a well-lit cabinet designed with a mirrored backing. However, you shouldn’t try too hard if you are an amateur mineral collector.
Most people may display their samples in small drawers or average-sized plastic containers. You can arrange your samples using various strategies; however, it all comes down to preference.
You could choose to place the largest piece of mineral at the center and place the others in concentric circles around it. Other people may prefer to display their minerals in a grid.
This can be a good choice depending on what type of collection you have. It can also be quite pleasing and geometrically appealing if you have samples that are similar in size.
You can also place them in glass containers. Some people prefer glass display containers because they allow you to see the mineral samples while keeping them safe.
You can display your collection in various glass containers based on location, size, and other categories mentioned above.
You should avoid packing several samples into a small area. Placing them all together makes it difficult for you to appreciate each sample’s beauty.
It would be best to give each sample enough room to allow you and others to observe and admire its beauty individually.
However, it would help if you also placed it close enough to other pieces to provide a sense of order and provide some contrast.
You should ensure your display cards are uniform if you display them with your samples. Each label should have similar formatting, easy-to-read fonts, and be professional.
This adds to the impression of the entire collection. Ensure that they are arranged so that they don’t distract or obscure the viewer from the primary attraction, the minerals.
You can choose to display your collection without the display cards if you plan on making it more private.
How to Store the Rest of Your Minerals Collection Properly?
Samples that were not interesting enough to be displayed are still important and should be cared for appropriately.
You’ll need to keep the samples organized and safe for when needed. You should ensure that the items aren’t touching each other since the friction could affect their physical integrity.
You should also ensure that they are protected from the elements.
The best way to keep your specimens safe from breaking would be to wrap them in newspaper and place them in individual boxes.
You can use shoe boxes or egg cartons if you don’t have small boxes. However, this is a temporary solution, and you should buy some storage boxes to store your collection safely.
It would help if you kept the minerals out of direct sunlight. Exposing the minerals to direct sunlight for extended periods may darken or bleach them.
Additionally, you should note that some minerals dissolve in water and may break down if exposed to humid conditions.
It will help keep your mineral collection in a dry, dark place. You can also store your samples with silica gel or rice to remove some humidity.
The general guidelines listed here will protect most of your mineral samples. However, some fringe cases may require you to research how to care for each specimen before storing them.
You’ll need to take some time and analyze each rock to find out the best storage conditions. Remember that a badly broken specimen may become worthless because it loses its beauty.
You could place such minerals on cotton or foam padding before storing them away. Crystallized minerals that look delicate should be kept in a firm, stable location to prevent breaking.